LED Ceiling Light Replacement Guide for Singapore Homes
What if the LED ceiling light isn’t the part that has failed? Flickering or a sudden blackout can point to the light, its driver, a loose connection or a control issue. Before buying a replacement, identify the likely fault and check the fitting to avoid a mismatch. A safe led ceiling light replacement starts with understanding the existing setup, not simply choosing a new light.
If you’re unsure what’s behind the problem, you’re not alone. Ceiling fittings differ in how they’re mounted, connected and controlled, so a replacement needs to suit the setup already in place. Wiring work can also put your safety at risk if you don’t have the right knowledge.
This guide explains how to identify common LED ceiling light types and spot signs that a light or driver may have failed. You’ll learn what to compare, including the fitting, cut-out and controls, and which safety checks matter before replacement. We’ll also cover when fixed wiring or ceiling work should be left to a professional. Sar Deen Engineering Pte Ltd provides residential light fixture installation across Singapore.
Key Takeaways
- A led ceiling light replacement may involve changing a lamp, driver or complete fitting. Identify which part needs attention before choosing a replacement.
- Compare the fitting type and dimensions, then check brightness by lumen output rather than wattage alone.
- Match the replacement to the existing controls and room conditions to avoid an unsuitable fit or lighting effect.
- Prioritise electrical isolation and safe working conditions. Never handle exposed wiring or work on an energised fitting.
- Use replacement steps as an overview, not as permission to do fixed-wiring work. Professional installation is the safer choice when wiring or ceiling access is involved.
LED Ceiling Light Replacement: Identify the Fitting Before You Choose
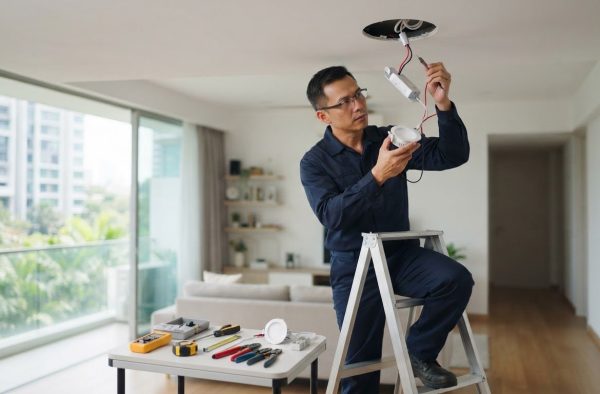
A led ceiling light replacement can mean changing a replaceable lamp, replacing a separate driver or removing the complete fitting. These are different jobs. Identify what’s installed before shopping, or you could end up with a light that doesn’t fit the ceiling, connect to the existing setup or work with its controls.
Some ceiling lights use a replaceable LED lamp, such as a bulb held in a socket. Others contain an integrated LED module, built into the fitting rather than changed like a standard bulb. The complete luminaire includes the light source, housing and other fitting parts. If its module or driver fails, replacing the entire fitting may be the practical option, depending on its design and condition. For background on how LED lamps work, see Wikipedia’s overview of LED technology.
How to tell whether the lamp, driver, or whole fitting needs attention
Look for clues, but don’t treat them as a diagnosis. Uneven lighting may suggest a problem with the light source or its connection. Intermittent operation or flickering can have several causes, including a lamp, driver, control or wiring issue. No illumination could mean a failed lamp or driver, but the fault may also lie elsewhere in the electrical circuit.
These symptoms can help you describe the problem, but they can’t confirm which component has failed. Don’t open the fitting or inspect electrical components while they’re connected to power. If the issue appears to involve wiring or internal parts, leave the assessment and repair to a professional.
What to record about the existing ceiling light
Before choosing a replacement, gather details you can see safely from outside the fitting. A clear photo can help you compare options later. Note:
- Fitting type: Is it recessed into the ceiling, surface-mounted or suspended?
- Approximate dimensions and mounting: Record the visible diameter or width and how the fitting attaches. For a recessed light, note the visible opening size if you can do so without removing it.
- Product label: Copy any visible make, model or electrical information.
- Light appearance and controls: Describe whether the light looks warm, neutral or cool, and check whether it’s controlled by a dimmer or another control.
- Room conditions: Note whether the fitting is in a dry room or a damp area, such as a bathroom. Choose a replacement rated for its intended location.
This information narrows your options and helps prevent a mismatch. If the fitting’s identity or the cause of the fault remains unclear, avoid guessing. Professional light fixture installation can help complete a replacement safely when the work involves the fitting or fixed wiring.
LED Ceiling Light Replacement Safety in Singapore: What to Check First
Put safety ahead of the replacement. Before any permitted work on a light, make sure it’s switched off and the fitting is cool. A wall switch alone may not isolate every part of the electrical circuit. Never handle exposed wiring or work on an energised fitting. If safe isolation is unclear, stop and arrange professional help.
Keep your checks visual. You can note whether the light is flickering, whether the cover appears damaged or whether there are signs of heat without opening the fitting. Electrical testing, removing covers that expose wiring, changing connections and altering fixed wiring require appropriate knowledge and care. Don’t try to diagnose an electrical fault by touching components.
When to stop and arrange professional electrical work
Stop if you see exposed, damaged or unfamiliar wiring, or if the fitting looks overheated. A burning smell, unusual heat or repeated circuit tripping is a warning to leave the circuit off and stop testing the light. Don’t replace parts and restore power to see whether the issue goes away. Professional light fixture installation is a safer next step when the fitting, wiring or ceiling needs attention.
Singapore electrical safety requirements to verify
In Singapore, the work involved matters. A simple lamp change is not automatically the same as altering fixed wiring or installing a complete ceiling fitting. The Energy Market Authority explains Singapore’s electrical safety requirements, including the role of Licensed Electrical Workers. Check current EMA guidance for the work in question, and have fixed-wiring work handled by an appropriately licensed professional. Don’t assume a task is permitted just because it appears straightforward.
Product instructions matter too, but they don’t replace applicable safety requirements. Follow the manufacturer’s directions for the fitting and its intended use. Don’t proceed if the instructions call for wiring work you can’t safely perform. For a replacement involving fixed wiring or ceiling fitting work, professional light fixture installation can help complete the job safely.
Choose a Compatible LED Ceiling Light: Fit, Controls, and Room Conditions
A suitable led ceiling light replacement needs to match more than the look of the old fitting. Compare its mounting style, dimensions, light output and controls with the existing setup. Check the product maker’s instructions before purchase, especially if the replacement involves a driver or fixed wiring.
Match the replacement to the ceiling and existing controls
Surface-mounted fittings sit against the ceiling, while recessed lights fit into a ceiling cut-out. Neither style is right for every home. Compare the new fitting’s size and mounting points with the existing ceiling, and consider whether its shape will cover the old opening. Don’t assume a similar-looking light will fit.
Check the controls too. If the current light uses a dimmer, the replacement must be suitable for dimming and compatible with that control. Match the light’s colour appearance and output to the room’s purpose and existing lighting rather than selecting by appearance alone.
| What to compare | What to check |
|---|---|
| Fitting type | Recessed, surface-mounted or another style; confirm how it attaches. |
| Dimensions | Measure the visible fitting and, where relevant, the ceiling cut-out and mounting points. |
| Brightness | Compare lumen output where available. Wattage describes power use, not brightness by itself. |
| Colour temperature | Check the stated colour appearance, such as warm, neutral or cool, and how it will suit the room. |
| Controls | Confirm compatibility with existing dimmers, switches or other controls. |
| Room conditions | Check the maker’s stated suitability for dry, damp or enclosed locations. |
Check room suitability and product information
Bathrooms and other damp areas need particular care. Read the product documentation for the fitting’s stated location suitability and protection rating. Don’t guess what a rating means or assume a fitting intended for a dry room can be used near moisture. Follow applicable guidance for the installation location.
Before choosing, review the manufacturer’s specifications for voltage, dimensions, driver requirements, mounting and installation. Check how the replacement connects to the existing wiring, but don’t open the fitting to investigate. For fixed electrical work, refer to the Energy Market Authority’s official electrical safety guidelines and arrange professional help where required. A careful comparison can prevent a poor fit, incompatible controls or an unsuitable light for the room.

LED Ceiling Light Replacement Process: From Preparation to Final Checks
A safe led ceiling light replacement depends on the fitting, the ceiling and the electrical work involved. Use this sequence as an overview, not as permission to work on fixed wiring. In Singapore, arrange a Licensed Electrical Worker where the work falls within the scope requiring one. Never handle exposed wiring or work on an energised fitting.
Prepare for a replacement without taking electrical risks
Before work begins, gather the existing fitting’s details, the replacement’s instructions and any measurements needed to compare the two. Keep children and other occupants clear of the work area. Power must be safely isolated and verified before anyone works on the fitting. If you can’t be certain this has been done, don’t remove or handle it. Leave the task to a professional.
- Identify: Establish whether the job involves a replaceable lamp or a complete fitting. Check dimensions, mounting style, controls and product instructions.
- Isolate: Ensure the relevant circuit is safely isolated and verified before any work begins. Don’t rely on the wall switch alone.
- Remove, if safe: Removal depends on the fitting’s design and access. Stop if it exposes wiring, feels unstable or doesn’t come away as the instructions describe.
- Fit: Install only where the work can be done safely and is within your competence. Fixed-wiring connections should be handled by a suitably qualified professional.
- Test: Once the fitting is installed and safe to energise, check that it operates steadily and that its output and dimmer behaviour are as expected.
What professional installation and final checks cover
A professional installation checks that the fitting is aligned and securely mounted, that connections suit the installation and that the product instructions are followed. Afterward, the light should operate consistently, produce the expected illumination and respond properly to its controls. Don’t keep testing a fitting that flickers, overheats or trips a circuit. Leave it switched off and arrange an inspection.
Ceiling access, the fitting’s design and any fixed-wiring work can make replacement more involved than it first appears. For context on related household electrical work, read this Singapore residential electrical services guide. Sar Deen Engineering Pte Ltd provides light fixture installation for homes.
When Professional LED Ceiling Light Replacement Makes Sense
Replacing a lamp can seem like a simple DIY task. Replacing an entire ceiling fitting is different. The work may involve fixed wiring, a ceiling cut-out, mounting points or access at height. Identifying the product is one thing; safely removing and installing it is another. If the job goes beyond a straightforward lamp change, professional help can manage the fitting and installation as one task.
Consider professional led ceiling light replacement if the wiring is unfamiliar, the fitting is damaged or the light keeps failing after a lamp change. A high or awkward ceiling adds another risk, especially if you can’t reach the fitting securely. Don’t climb or work at height without safe access, and never handle exposed wiring.
Situations where professional installation is the safer route
Stop and arrange an assessment if you notice scorching, heat, a burning smell, repeated flickering or a circuit that keeps tripping. Leave the circuit off if you suspect an electrical fault. Bathroom and other damp-area fittings also need careful product selection for their location. Follow the fitting’s instructions and applicable guidance rather than guessing whether it’s suitable.
In Singapore, the licensing requirement depends on the electrical work involved. Fixed-wiring work may need to be carried out by an appropriately Licensed Electrical Worker. Don’t assume every lamp change has the same requirements as replacing or altering a wired ceiling fitting.
What to expect from a residential light fixture installation
A proper replacement starts with the fitting and the conditions at your home. The installer can account for the existing mounting, ceiling access, product instructions and the work required to connect the new fixture. After installation, the fitting should be secure and aligned, and its operation should be checked, including the light output and dimmer response where relevant. If a problem appears during testing, the light shouldn’t simply be left in use.
Sar Deen Engineering Pte Ltd provides residential light fixture installation in Singapore. If fixed wiring, difficult access or an unfamiliar fitting makes the job more than a simple lamp change, residential light fixture installation is available to complete the replacement.
Make Your Next Ceiling Light Replacement a Safe One
A reliable led ceiling light replacement starts with identifying whether the issue involves a lamp, driver or complete fitting. Then match the replacement to the existing dimensions, mounting, controls and room conditions. Symptoms such as flickering or dimming can have more than one cause, so avoid guessing at the fault.
Keep safety in front of the task. If replacement involves fixed wiring, a damaged fitting or difficult ceiling access, professional help can make the process safer and more straightforward.
Sar Deen Engineering Pte Ltd provides residential light fixture installation, alongside electrical and home maintenance services across Singapore. With the right fitting and safe installation, you can restore dependable lighting and feel confident about the result.
Frequently Asked Questions
Can I replace an LED ceiling light myself?
You may be able to replace a simple, accessible lamp if the product instructions allow it and you can do so safely. Replacing a complete fitting or handling fixed wiring is a different task and may require a Licensed Electrical Worker in Singapore. Never work on an energised fitting or handle exposed wiring. If you’re unsure how to isolate the circuit safely, stop and arrange professional light fixture installation.
How do I know whether the LED light or its driver has failed?
You usually can’t confirm the failed component from symptoms alone. Flickering, intermittent operation, uneven light or no illumination can point to a lamp or driver issue, but controls, connections or the circuit may also be involved. Note what the light does and when the problem occurs. Don’t open the fitting to inspect its driver or wiring. A professional can assess the fault safely.
What should I check before buying a replacement LED ceiling light?
Compare the fitting style, dimensions, mounting method and ceiling cut-out, where relevant. Check the product label and manufacturer’s instructions for voltage, driver and installation requirements. Compare brightness by lumen output rather than wattage alone, and match colour appearance to the room. Confirm compatibility with existing dimmers or controls. For bathrooms or damp areas, check that the fitting is specifically suitable for the location.
Do I need to replace the whole LED ceiling light when it stops working?
No, not always. Some fittings use a replaceable lamp, while others have an integrated LED module or a separate driver. A failed lamp may be replaceable on its own, but a module or driver fault can require repair or a complete fitting replacement, depending on the design. Flickering or a blackout doesn’t identify the failed part by itself, so avoid replacing components based only on symptoms.
Is it safe to replace an LED ceiling light in a bathroom?
It can be safe only if the fitting is suitable for its location and the work is done safely. Bathrooms have damp areas, so check the manufacturer’s stated suitability and protection rating rather than assuming an ordinary ceiling light is appropriate. Never work on an energised fitting or exposed wiring. If the replacement involves fixed wiring or you’re uncertain about safe isolation, arrange professional installation.
Why does my new LED ceiling light flicker after replacement?
Flickering after replacement can have several causes. The LED fitting may not be compatible with an existing dimmer, or there may be an issue with the driver, connections or electrical circuit. Don’t open the fitting or attempt wiring changes to investigate. If flickering continues, or the light becomes hot or trips the circuit, stop using it, leave the circuit off if a fault is suspected, and arrange a professional inspection.
How long does LED ceiling light replacement take?
There isn’t one reliable timeframe for every replacement. A straightforward change involving an accessible lamp differs from fitting a complete luminaire, working with fixed wiring or reaching a high ceiling. The fitting’s mounting, ceiling condition and any fault that needs diagnosis can also affect the work. Don’t rush to meet an estimated duration. Prioritise safe isolation, correct installation and final checks for stable operation.